
Seriously one of the most manly 15 year-olds I’ve ever seen. At almost 6’3″ and 180lbs, Tony was asked to play on the Varsity football team this coming year instead of the Sophomore team. They are afraid he might hurt the kids his age.
EDGY, WHOLESOME

Seriously one of the most manly 15 year-olds I’ve ever seen. At almost 6’3″ and 180lbs, Tony was asked to play on the Varsity football team this coming year instead of the Sophomore team. They are afraid he might hurt the kids his age.
That I Would Be Good
that I would be good even if I did nothing
that I would be good even if I got the thumbs down
that I would be good if I got and stayed sick
that I would be good even if I gained ten pounds
that I would be fine even if I went bankrupt
that I would be good if I lost my hair and my youth
that I would be great if I was no longer queen
that I would be grand if I was not all knowing
that I would be loved even when I numb myself
that I would be good even when I am overwhelmed
that I would be loved even when I was fuming
that I would be good even if I was clingy
that I would be good even if I lost sanity
that I would be good
whether with or without you
I’m obsessed with trees. I’ve done more tree sketches and paintings than I can count. I see something new all the time and try to capture it on canvas. This 4 foot square painting made with paper, modeling paste and acrylic paint is one of my all time favorites.
Detail –
Forest in Blue is for sale here. Other paintings are available here.
Things are hard right now. I can’t talk about any of it at the moment but I feel a post coming soon. Thanks to those of you checking in on me. I appreciate the love.
xoxo


I don’t eat much onion. In fact, as a rule, I remove it from everything from burgers to salad.
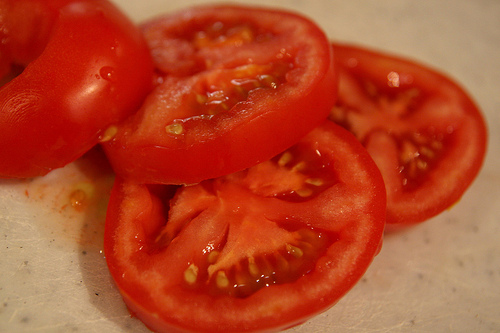
I don’t enjoy the taste although I do like the crunch. But, what I really don’t like is the aftertaste for days that comes along with it.

This is a sad thing for my husband who loves onion and garlic and all things stinky but delicious. If he eats it, I can’t kiss him for a few days without gagging. Not really a good thing for intimacy.
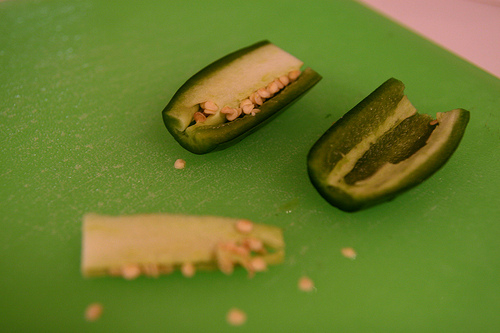
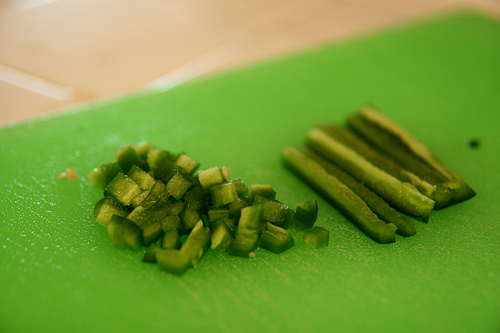
But I love Pico de Gallo. LOVE. It’s half chopped onion but I don’t care.
I shovel it in my mouth using tortilla chips as a vehicle. Why this discrepancy? I have no idea. It’s a little unsettling. It goes against my nature. Against the grain. Against everything I believe in. Against my testimony of avoiding smelly vegetables in the allium family. And yet, I snork it like nobody’s business.

Pico de Gallo is sometimes called salsa picada, which means chopped sauce. Pico de Gallo itself means rooster’s beak and I have no idea why. Maybe you do and you’d enlighten me?

Pico de Gallo
1 medium to large white onion
4 large, ripe tomatoes
1 bunch cilantro
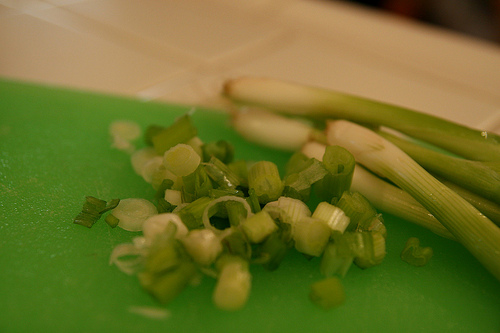
1 bunch green onions
seeded jalapenos to taste
lemon

Chop tomatoes and onion into dime (or smaller) sized pieces. Place both in large bowl. Cut off the green onions’ root ends and half the green stalks, leaving the pretty and firm bottom to mid-section. Slice slim rounds and add to bowl. Chop or snip small pieces of cilantro. De-seed jalapeno and slice in to tiny chunks, maybe a third the size of the tomatoes. If you really like the taste of jalapeno, add as many as you want. If you want your salsa hotter, keep some of the seeds in the mix. Squeeze lemon or lime juice over the whole thing and mix well. I add a little salt to make the flavor pop but if you’re watching your sodium, it’s great without it.
Then, snork it with some chips.
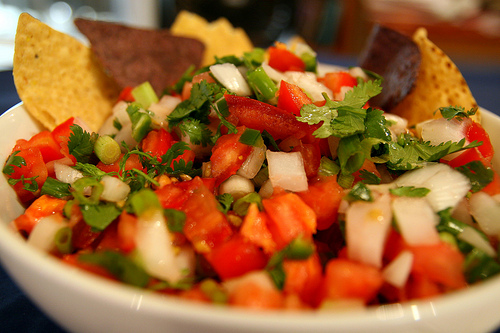
I find it keeps ok for one day, but any longer and it gets too wet and the flavors fade and change. Store it in an airtight container and before serving the next day, drain as much fluid from the bottom as possible.
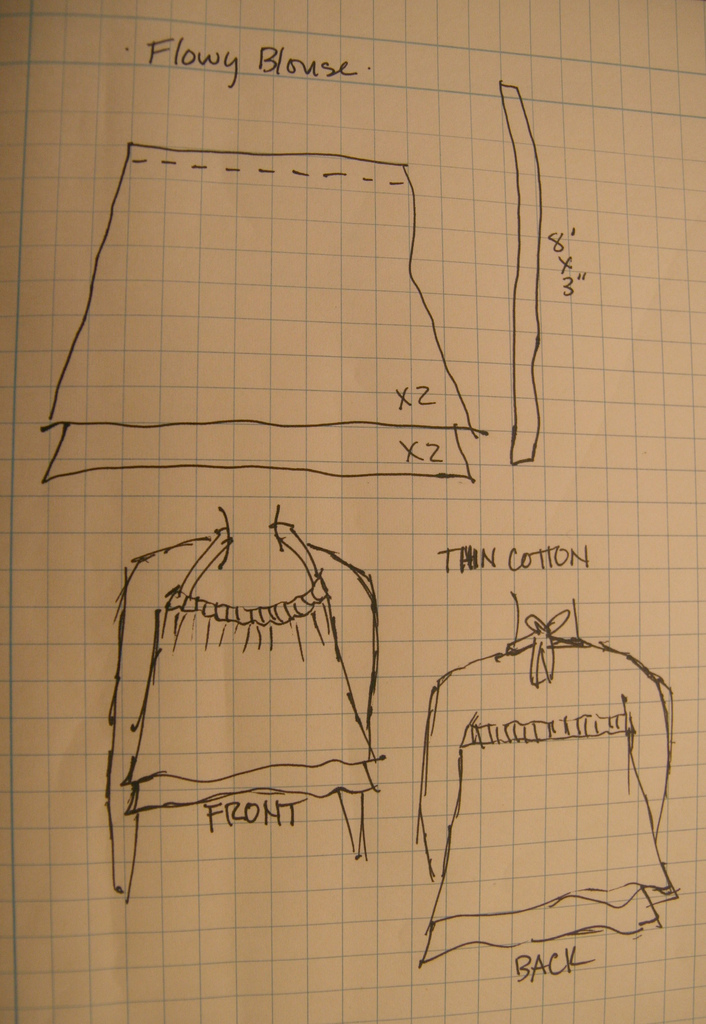
I found some sheer white fabric for about a dollar a yard and bought a bunch. I thought it would make a great top and decided to make it two layers so you couldn’t see through it anymore, but it still looked flowy and airy.
I made a pattern from a loose-fitting tshirt.

I folded the top and arms in right above the bust line.

Then I drew line around it, marking how big it was.

I added 4″ inches to the top, 2.5″ to the sides and 3″ to the hemline, extended the pattern, cut it out then pinned it to the fabric. Because the fabric was so sheer, I cut through four layers of fabric at once. But it’s tricky, so do that at your own risk.

Next time, I won’t add anything to the hem and keep it just what it is. Because when I layered the panels, the bottom layer ended up being about 7″ too long and I had to cut it off. The top layer was three inches too long (how much I added) and I had to cut it off.

I sewed two pieces together to form a shirt front and back and then I did the same with the other two panels. After turning them both so all the seams were on the outside, I took one panel and put it over the other panel, pulling it down 3 inches and sewing in place. Then I turned it right sides out to make sure it looked good on the outside.

As you can see in the photo below, the inside layer is now 3-ish inches longer then the outer layer.

Next I rolled the top down in thirds towards the inside, creating a tube inside where the neck strap will go later.

I pinned it and sewed it down next to the seam I sewed to place the inner panel lower than the outer panel. HINT – after pinning, sew it with the outside up so you can make sure the seam is straight and looks good from the outside.

Then I cut a button hole shape near both side seams and used no-fray to seal the edges.

To make the neck tie, I cut a 3″ by 8′ long strip and folded in half. I pinned and sewed down the long side and one short end. I used a ruler to create an angle line, sewed and trimmed.

Using a thin wooden spoon, I turned the strap right side out then top stitched the seams I had sewn, closing the open end as I went.

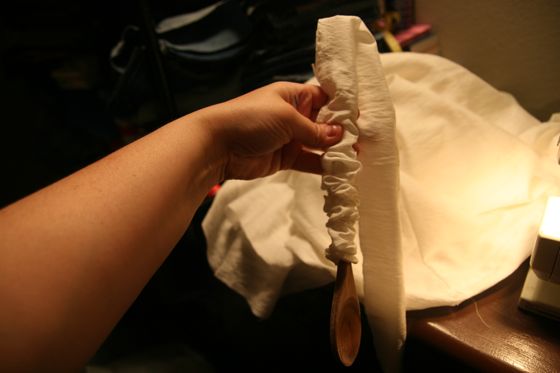
To place the strap, I placed a large safety pin on one end and took the strap all the way around, pulling it out the same hole I sent it in to. Then I took the other end and pushed it through to the other hole. Imagine a pretzel crossing in front and going out each hole. When you’re done, you should have the strap going completely around your back, crossing in the front with the ends coming out the holes.

I tried the shirt on, cinching the strap tight until it felt snug but comfortable around my back and neck. After tying it, I checked the length in the mirror. This is where I cut off the fabric as I described before. After I shortened it, I used a straight stitch at 1/4″ from the edge and a tight zigzag to finish, not rolling or folding for the hem. If you own a serger, you could use either of those stitches to create a clean edge. Since I don’t have a serger and I’m ok with a little unfinished look on this shirt, I was fine doing it that way.

It’s cool and summery and flows nicely.


This cake is delicious. It tastes similar to a Ding-Dong or a Suzy-Q. The cake is moist and has a nice crumb. And the frosting is easy. So, if you like chocolate and marshmallow together, then this is the cake for you. This cake will make an appearance at our vow ceremony this December.

You’ll need 3 9″ishX2″ish round cake pans for a 3 layer cake or 2 9″ishX2″ish round cake pans for a four layer cake. I love to use springform cake pans to eliminate a lot of the hard work getting the cake out of the pan.
Cake
3 cups cake flour
3 cups sugar, combination of white and brown (I do half and half)
1 1/2 cups cocoa powder
3 1/4 tsp. baking soda
3/4 tsp. salt
3 stick unsalted butter, room temp
1 1/2 cups buttermilk*
3 large eggs
1/2 cup coconut oil
1 cup applesauce
*TIP – you can make your own buttermilk from regular milk by adding about 1 TBL lemon juice per cup of milk. Let sit for about 5 minutes.

First preheat your oven to 350, spray your cakepans (or butter and flour) and cut waxed paper for pan bottoms. Spray waxpaper, too.

In a large bowl, combine all dry ingredients and mix with hand mixer (or awesome large mixing appliance) until well combined.

Add butter, buttermilk, oil and applesauce. Mix until well blended.

Add eggs all at once and whip on high for about 3-4 minutes until fluffy (er). Scrape sides and slightly mix again.

Place even amount of batter in each cake pan. In 3 pans it should come up about an inch. In two pans it’s about 2 inches. Slap on counter a few times to get air bubbles out and even out the batter.
This is a great time to mix yourself a cool drink to get you through baking in a hot kitchen in the middle of a hot summer.

Bake in oven for 20 minutes. Turn oven down to 300 and rotate pans. Check in 10 minutes for 3 layers an 15 minutes for 2 layers and remove from oven when toothpick comes out clean. Let cool in pans for 10 minutes then remove from pans and place on cooling racks paper side up. Wait until completely cooled, about an hour, before removing waxed paper. And then drop one of the layers on the counter if you are me.

At this point, you could make the frosting and complete the cake but it’s much easier to frost and construct if you place the layers in the freezer for an hour.

Carefully wrap the layers in a layer of plastic wrap and a layer of tinfoil. Lay them flat in the freezer. If you want, you can make the layers and freeze them for up to three weeks before completing the cake. If you’re going to leave the layers in for more than a few hours then you need to wrap them with three layers of plastic wrap and 3 layers of foil.
Pull the layers out of the freezer to slightly thaw while you make the frosting.
Frosting (7-minute frosting except it take me longer than that)
4 large egg whites
3/4 cups granulated sugar
1/2 cup light corn syrup
1/4 cup plus one TBL water
2 tsp vanilla extract
pinch of salt

Place all ingredients in a large metal bowl over stove top simmering water. Don’t let the bowl touch the water. Beat with hand mixer at high speed for 5-7 minutes until hard peaks form.

Remove from heat and continue to whip on high for 3-5 minutes until mostly cooled.
Trim to straighten your layers. If you made the cake in two layers, slice the layers in half. As you stack the cake layers, make sure the top layer is flat bottom side up. For the three layer cake, no need to cut. Just layer. I actually didn’t cut any off the tops of my layers this time and just let the shape of the cake be what it was. I do that a lot when I’m going to serve it to the family for dinner.

Do this this prep on a plate that fits in the freezer and not on a pedestal. Place two overlapping pieces of waxed paper under the bottom layer for easy transferring later. (Although this adorable dragonfly plate could be used to serve the cake on. I love it!)

Use an ample amount of frosting in between layers. I did it a little thin this time and everyone made a comment wishing there was more. So, don’t skimp!

Do a very thin crumb coat of frosting around the entire cake. Place back in freezer for 15-30 minutes.
Time to transfer to the pedestal. Place your plate over the pedestal near the edge and use the waxed paper to pull it on. You can also use a spatula to help it move over.

Now is the fun part. Blop all the frosting, minus about 1 cup, on top of the cake.

Use your clean and crumb-free spatula to gently smooth the frosting from the center towards the sides.

Keep pushing downward and then move across the sides around the cake, making the frosting even all the way around. If a few crumbs get on your spatula, immediately remove with a paper towel before continuing. Use the reserved frosting to fix any mistakes.

I like to take a knife and made some little doppy-dos on the top and keep the sides smoother. I think it looks pretty.

Wait about 30 minutes before serving and give the cake layers time to completely thaw before serving.
VARIATIONS – a layer of raspberry filling in the middle is delicious. Chocolate ganache is also a wonderful filling. A light coating of cocoa powder over the frosting is pretty. I haven’t tried it, but oozing a bit of chocolate syrup over the top dripping down the sides might be good, too.
Sorry for the low light in these photos. My kitchen isn’t that well lit but I’ll try and fix that for next time.
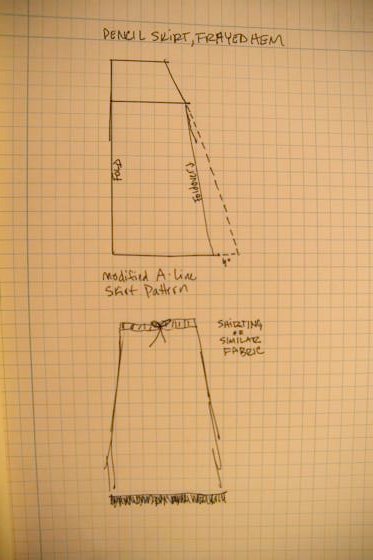
Remember that pattern you made last time? Get it out because we are going to use it to make this really cute Pencil Skirt. We’re going to modify the pattern just a little, so go grab your yard stick along with your scissors and pins.

Lay your pattern flat and measure in from the outside (not the fold side) 4″. Take your yard stick and make a line from the Hips line to the new mark and fold it. Cut your fabric out using the new line.

Go ahead and make the skirt the same way you did for the A-Line skirt. I got fancy and used a cording for the waist instead of bias tape.

For the hem, we’re going to fray instead of sew. Try your skirt on in front of a full-length mirror and check the length. You won’t be sewing any up in a seam allowance, so if it’s too long, mark it will a pin and cut it off.

When you have it where you want, do a straight stitch all the way around the skirt hem about 1″ above the edge. Use scissors or a seam ripper to cut up to the line, but not go through it. Take your fingers and pull the cross threads out all the way around. Look! How cute!
